Volkswagen Passat Forum banner

My Bag Build Thread (or how I took longer than anyone to do a Bag Build)

72K views 380 replies 54 participants last post by  mrgreek2002  
#1 ·
Hey guys, as some of you may know, I got crazy and decided I was going air. :banghead: (god knows what I got myself into :crazy:)

I have 3 shops in my city that do air ride installs and none of them can do it till the beginning of 2012. :hmmm:

So I'm going to try and do most of the work myself with the help of a local buddy. This guy has installed air on his AUDI already, all by himself, so he should be of some good use.

I plan to have the front suspension installed by my independent mechanic at the very end of the build, so all I have to do once the front suspension is installed is plug in the air lines into the front bags and air them up. ;)

I'm gonna attempt to install the rear suspension with the help of my buddy. :wrench:

I really need you guys to tell me if I'm doing something wrong along the way and tell me what is the right way of doing it! :angel:

Just started the build today!
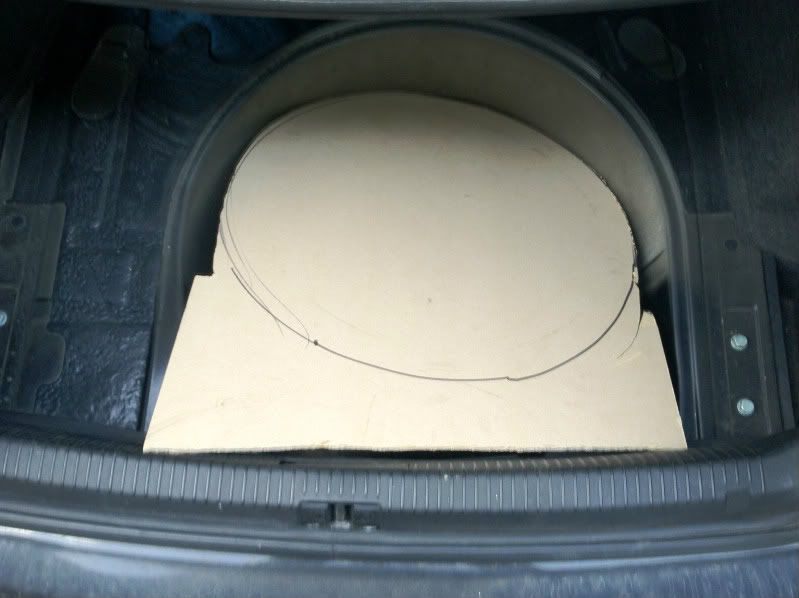
Update #1:

Spent 5 minutes on my trunk install mockup:

Image


I know this is not gonna be easy or fast, but I think I may be able to barely pull it off. :angel:
 
#7 ·
Some of you guys make me laugh.

Sure he might be getting in over his head but it's a learning experience and the end result, granted it might be filled with lots of trials and tribulations, he will have his own setup that he will know inside out.

It's not like he's dissasembling a tranny & quaife unit :poke:

Most people dish out $$$ for a kit and then have it installed, more credit to the guy doing it on his own even if it's a learning experience.
 
#8 ·
Some of you guys make me laugh.

Sure he might be getting in over his head but it's a learning experience and the end result, granted it might be filled with lots of trials and tribulations, he will have his own setup that he will know inside out.

It's not like he's dissasembling a tranny & quaife unit :poke:

Most people dish out $$$ for a kit and then have it installed, more credit to the guy doing it on his own even if it's a learning experience.
I know someone who does/did that... pretty sure he posted in here ;)

And that reference, is a good one, because to Dean, suspension is like disassembling a tranny to some... We are just pointing out that if you cant install your own suspension... Bag's may not be a good idea to have, because they are not just a throw them in and go, you run into SO many problems that most people dont describe, management freezing, leaking bags... compressors not shutting off... etc. I have been through this many times, as I'm sure Mikey and Matty have as well.. they knew the hell it is.

Dean, I'm not trying to be rude bud, just trying to prepare yourself for whats to come.

I have NEVER heard of someone paying to have a bag setup installed... and I have helped/installed 9 setups so far lol
 
#9 ·
Thanks for the props and heads up guys! :thumbup: :thumbup: You guys are the best! :salute:

Update #2:

Had some problems with the god damn jigsaw that I rented from Home Depot yesterday.

So I just returned it this afternoon and bought a different one with a better design.

So, now that I had a better jigsaw, I was finally able to cut the board a bit more on the bottom and a whole in the middle. :wrench:

Doesn't look great but it's good enough for something hiding under the trunk carpet. My plan is to paint this board gloss black.

Image


Received VW-Pssst's (Branden) ashtray gauge pod in the mail this morning. Tried to install my Dakota digital gauge in it, it seems like the fit is really tight. Plan on sanding down the inside wall of the pod tonight to make the gauge fit great. :wrench:
 
#14 ·
Received VW-Pssst's (Branden) ashtray gauge pod in the mail this morning. Tried to install my Dakota digital gauge in it, it seems like the fit is really tight. Plan on sanding down the inside wall of the pod tonight to make the gauge fit great. :wrench:
Great! glad to hear it man, I realized why my gauge was stuck... the inner walls were painted with Plastidip and a gauge was then put in right after... it dried.. got colder and boom! Tight fit. If you just sand it slightly it'll certainly come in/out nicely..

I heated that mofo up so much to get it out hahaha I pretty much ruined my gauge.
 
#15 ·
IC, thanks! :salute:

Air is simple....:poke:
I'm hoping so. :angel:

Good luck with it man, if i was closer i would help you some. I dont know shit about air either but two are better than one ;)
Thanks, wish you were in fact closer or in the same state (province) at least. ;)

^^me neither, I'm a noob when it comes to suspension :p

I hope you're not installing a pancake tank cause it doesn't fit in the spare tire well. FYI. It will stick up above the floor and you'll have to build a false floor to cover it.
That makes a few of us then! :D My original plan was to install my pancake tank under the carpet, yes. Then once I actually received it, I realized that was not gonna work. :cry: I have always had a plan B though. ;)

Great! glad to hear it man, I realized why my gauge was stuck... the inner walls were painted with Plastidip and a gauge was then put in right after... it dried.. got colder and boom! Tight fit. If you just sand it slightly it'll certainly come in/out nicely..

I heated that mofo up so much to get it out hahaha I pretty much ruined my gauge.
Thanks bro! :salute: Yeah I saw the plastidip inside the pod, wow! :O

------------------------------------------------------------

Questions:

1. Do I just hand tighten these fittings into my air tank?

2. Do I have to put some kind of liquid on the threads, like locktight or something? :confused:

Image


Thanks again guys! :salute:
 
#25 ·
Nice, yeah me too. I'm beginning to love them too! ;)

Can't wait for the finished product, and in person but LOL @ that cutout.:D
Yeap, I can't wait either! That cutout is one from which I got the idea to do it from a vortex member with a :b55: wagon. I wanted to buy his air set-up because it was for sale, but he never sold it to me :crazy:, so I'm just gonna copy it instead! :hmmm:

Update #3:

Went into AAC this morning, picked up an SMC water trap and some pink Teflon tape! :D

Image


Image
 
#26 · (Edited)
OK, so I finally managed to get everything out of my trunk and into my house.

I'm now trying to figure out my fitting set-up and I'm stumped at the watertrap exit part. Out of all the fittings that I have (they are all in the picture), nothing seems to fit on the exit port of the watertrap. :(

EDIT: After further review it seems like the fitting in the 11 o'clock spot in the middle of the tank seems to fit into the exit port of the SMC watertrap. So I would then have to push and connect line into that exit fitting and push and connect it into the fitting in the 4 o'clock spot in the middle of the tank. The only problem is that I'm out of 1/4 ports on my tank. So it looks like I need to get one that's 3/8 instead. :(

Image


Here's the diagram of how it's all suppose to be hooked up:

Image
 
#27 ·
Dean,

Your diagram of how its "supposed" to look, cannot work with that tank.... I've done 1 1/2 installs with that pancake tank (Those tanks suck for fitment)

Those tanks come with the right fittings for everything needed.


that small one in the middle is for your pressure switch... in your diagram the pressure switch is hooked up externally...

I would go back to AAC and get some adapters/push to connects so you can run the water trap off of one of the top ports..
 
#28 ·
Yeap, Kevin told me yesterday while I was at his shop that the diagram won't be exactly the same for my tank. So I know that. And I did figure out that the push to connect fitting that I have extra is the one needed to hook up the water trap. I just need to trade it for a 3/8th sized one.

I will be going back to AAC thursday afternoon to pick up other fittings that I have on order in order to hook up to my Dakota gauge senders. So I'll trade for it then.

And yes, Kevin also told me that my pressure switch will install into the center port on my tank. ;)
 
#29 ·
Update #4:

Monday's are a wash for me but I still did work!

I installed the in and out fittings on my water trap, installed my Dakota gauge into the gauge pod ashtray that I got from Branden (big pain in the butt), and installed the cork and air intake fittings on my tank.

However, when I tried closing my cork valve, the god damn thing snapped off in my hands! :O So I unscrewed it off my tank for now. I'll have to get a new one on Thursday when I go to AAC.

It's still slowly coming along! ;)

Image


Image
 
#30 ·
if by cork valve you mean tank drain valve, remember those are reverse thread on the valve part. im guessing you broke it off cause u were spinning it what you thought was the right way but didnt know it was reverse thread.