

While browsing the forum for some tips on replacing my starter I realized that there multiple tidbits here and there but not a proper DIY with pictures still active. Using this method I was able to remove the starter in a couple of hours, virtually hassle free.
Disclaimer: I AM NOT RESPONSIBLE FOR ANY DAMAGE THAT MAY OCCUR TO YOU AND/OR YOU'RE VEHICLE WHILE USING THIS DIY.
Tools:
• Sockets – 12mm, 13mm, 16mm, 5/8”
• Wrench – 16mm, 5/8”
Steps:
1. Disconnect vehicle battery, crack front passenger wheel bolt, properly lift front of vehicle and secure on jack stands. (My personal vehicle lifting and supporting setup at bottom).
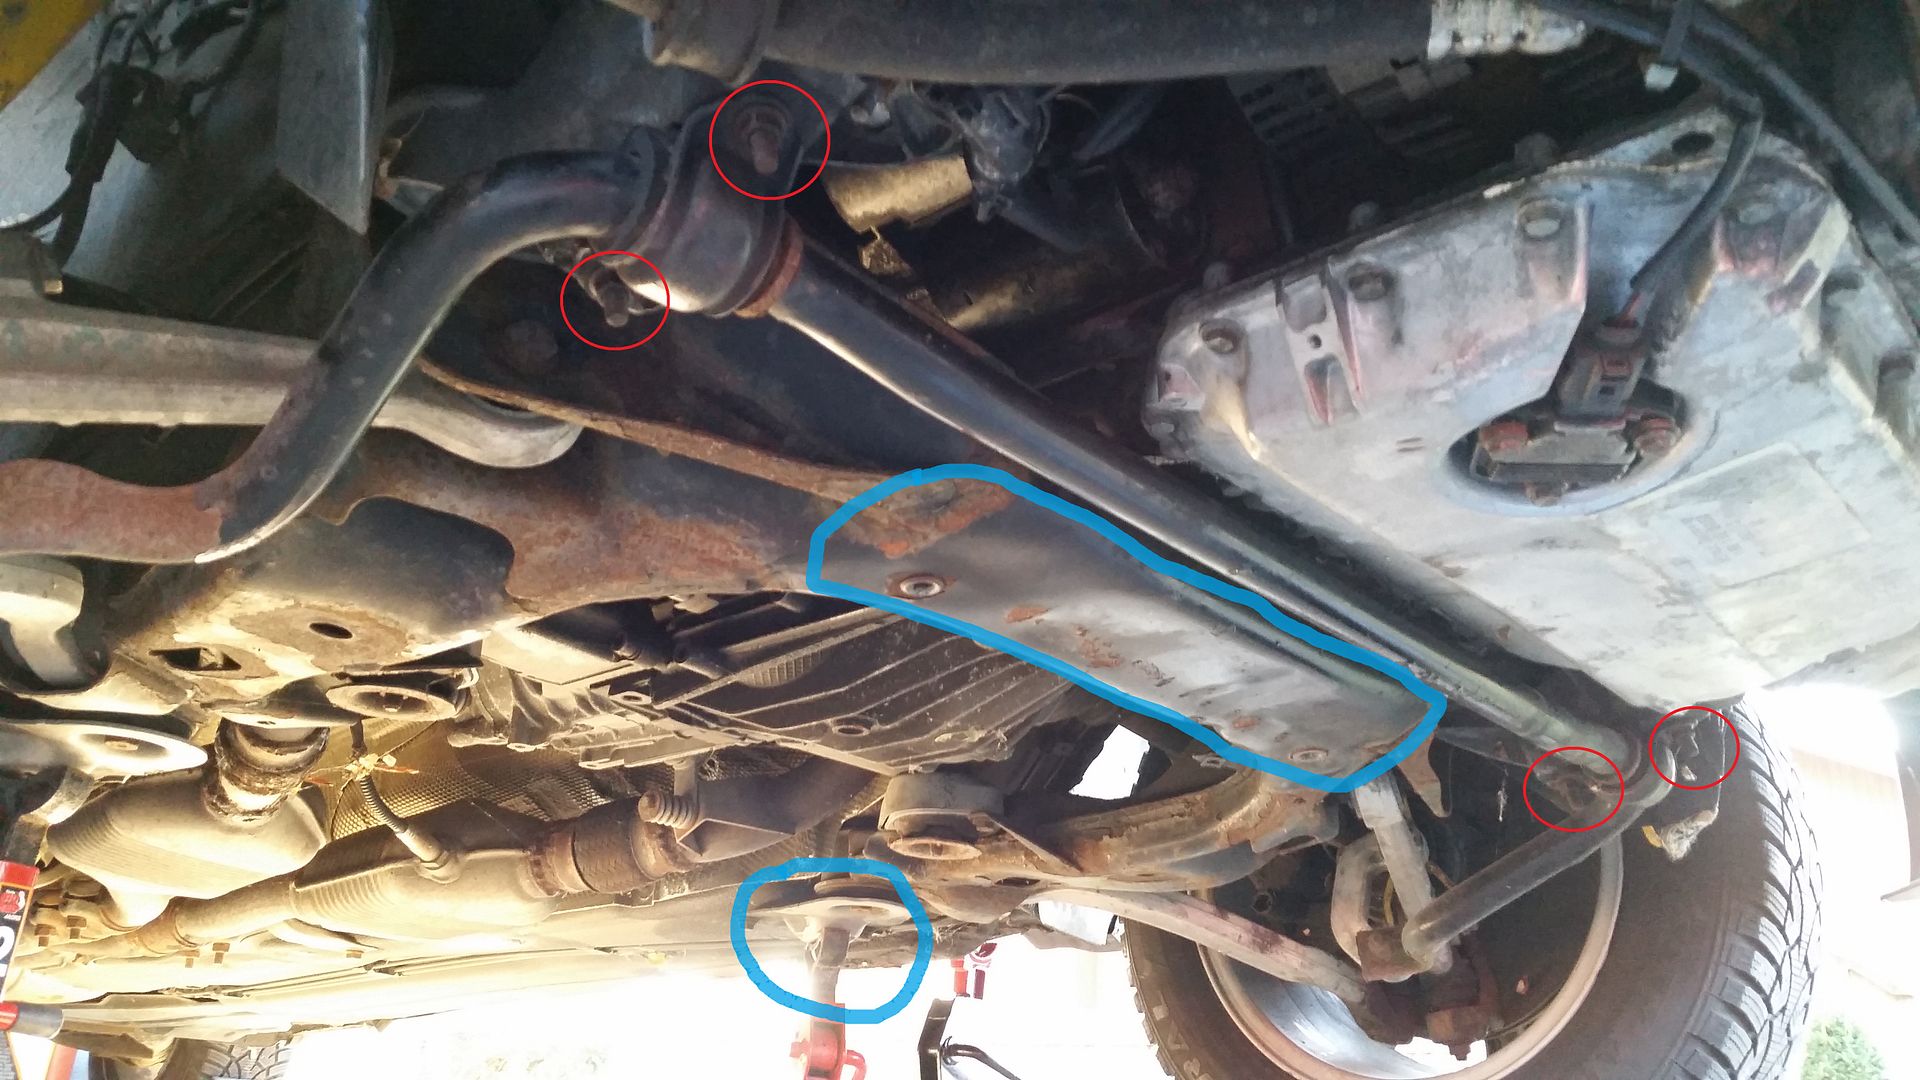
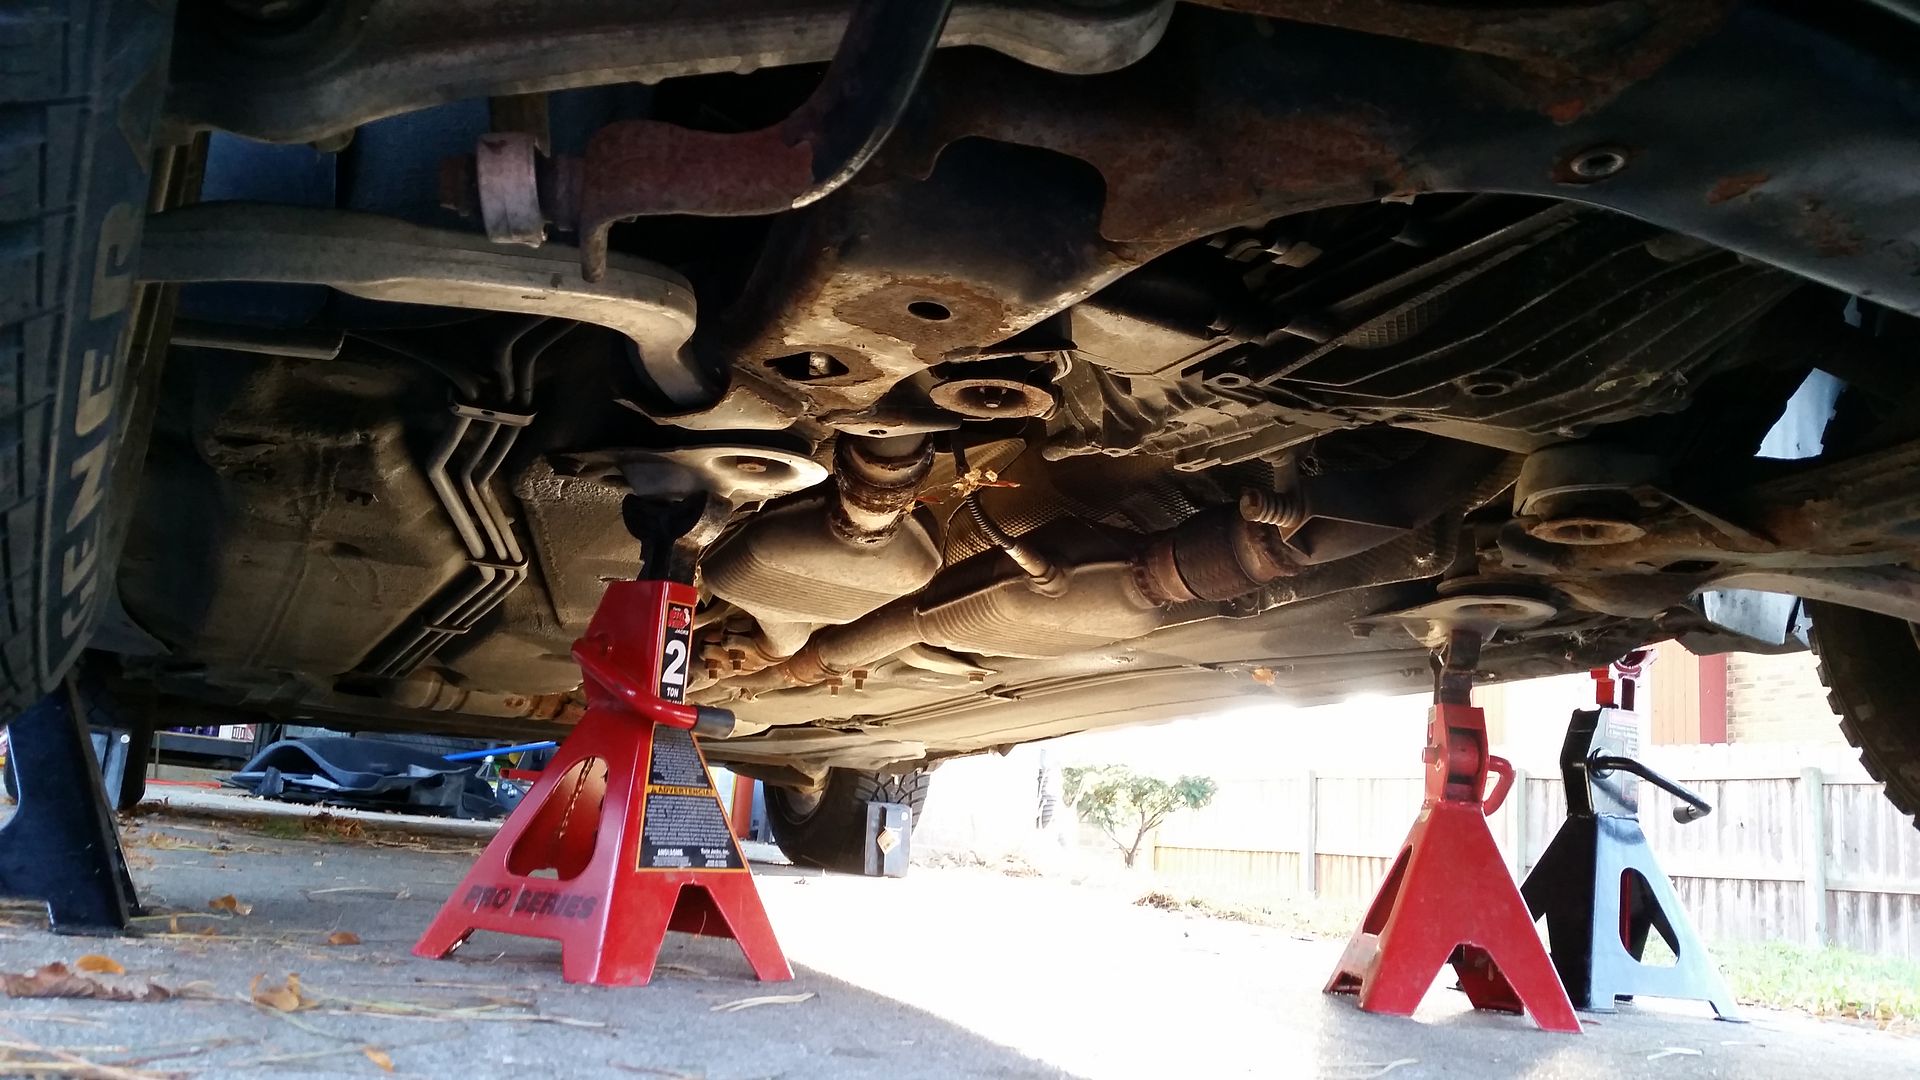
2. Removed the four bolts securing the sway bar and let it swing out of the way for now. The subframe directly behind the roll bar, highlighted in blue, is where I jack my car up from with a couple of 1x4s or so.
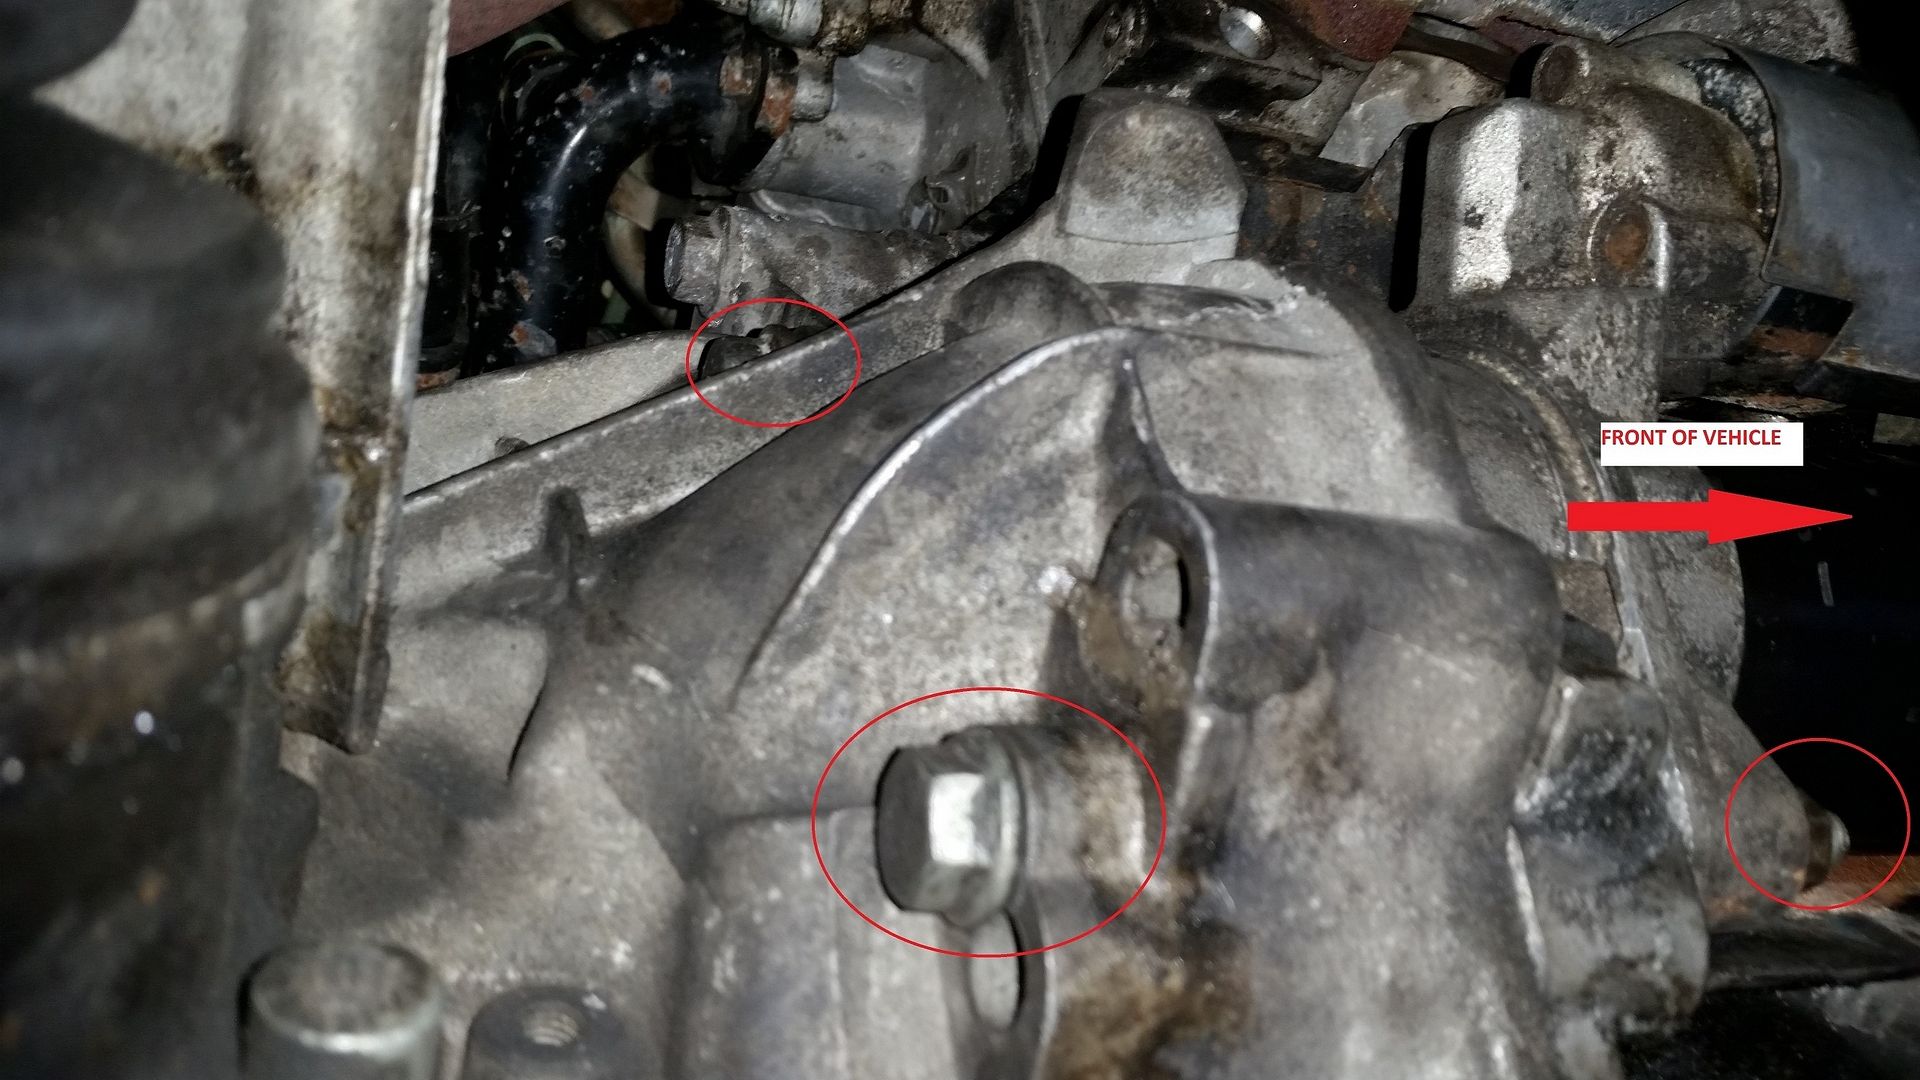
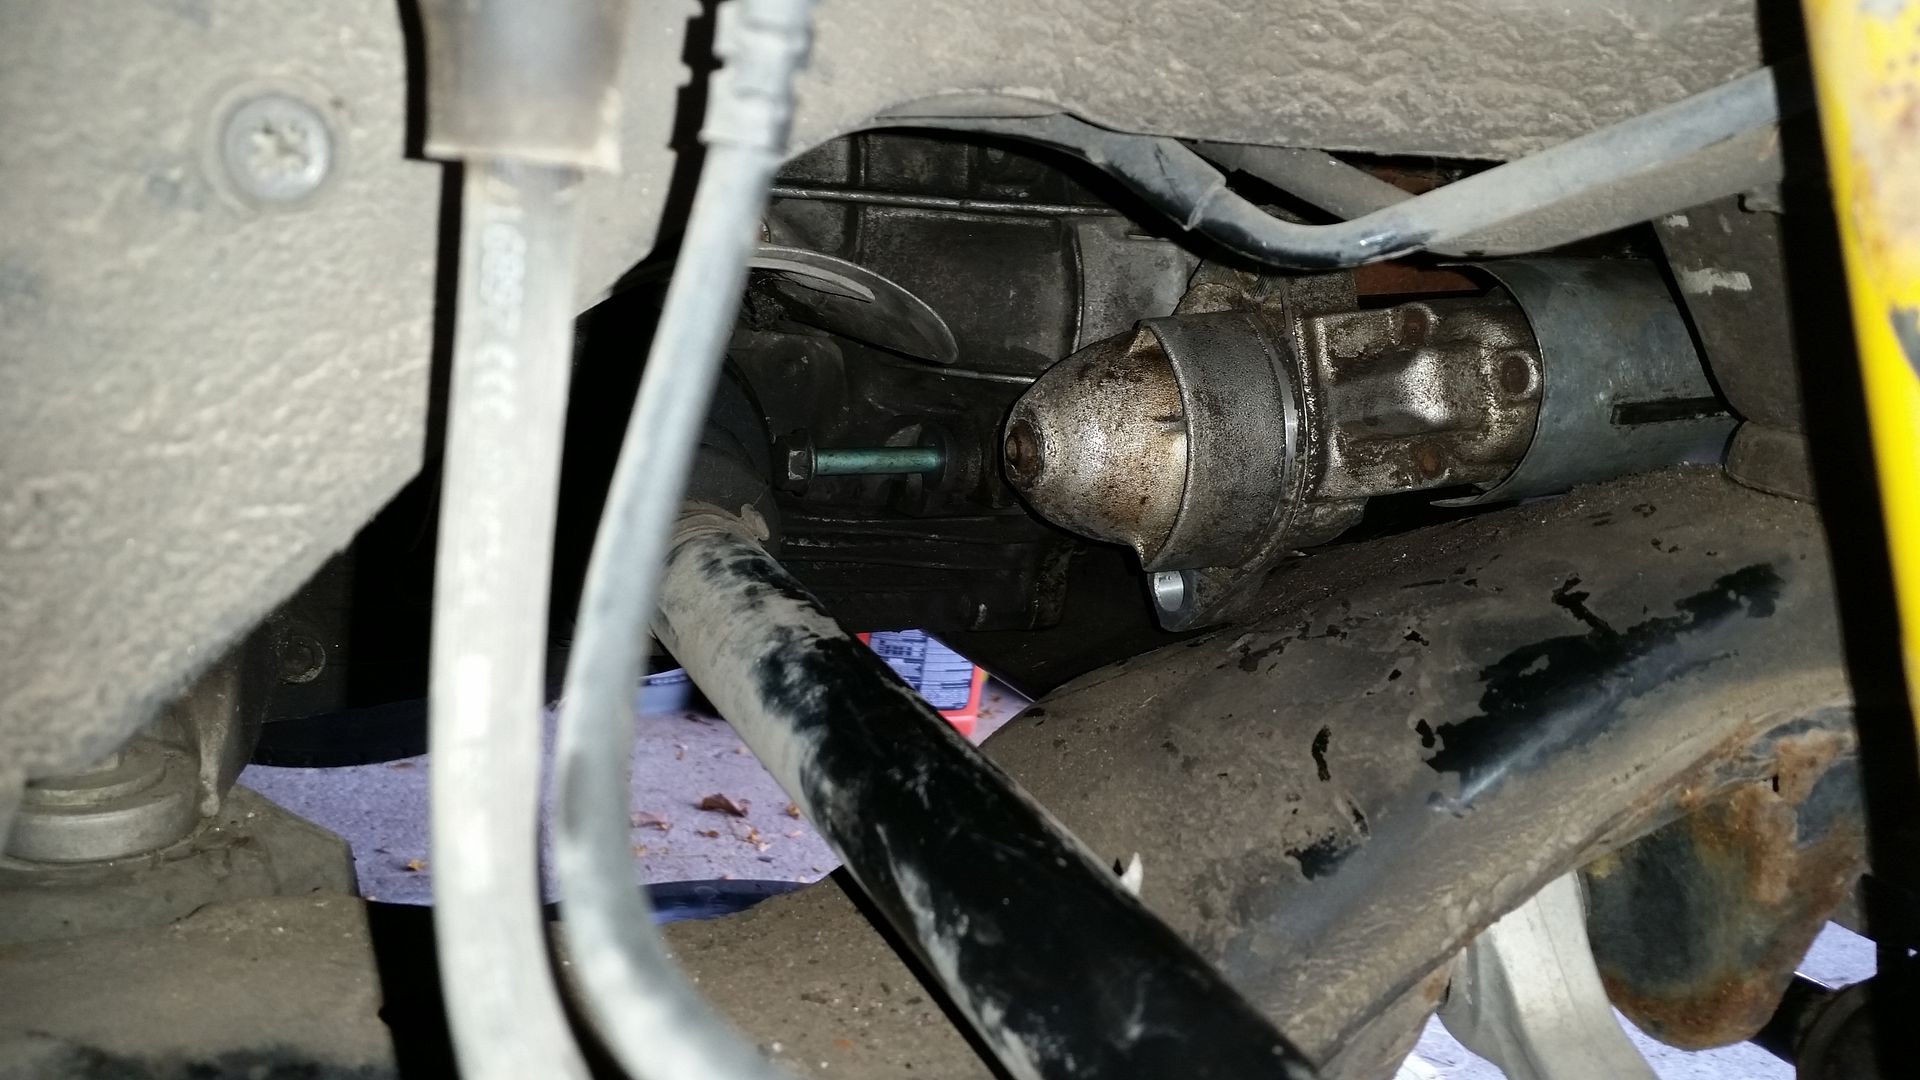
3. Remove the nut securing the main wires to the starter along with the plastic wire connector. It’s impossible not to break the plastic tab but it is a snug fit regardless. (Optional step: spray plastic connector with electrical contact cleaner and use a test light to check that this “trigger wire” is getting power when you turn the key)
4. With everything now out of the way start by removing the lower bolt/nut. I used a half inch drive socket wrench with an extension that was the perfect length to wiggle into the small space where the nut is and a wrench to hold the head of the bolt. I believe both 16mm and 5/8” work in this application but I believe I used 16mm for this bolt/nut combo. To start breaking the bottom bolt before backing it out I had to use a breaker bar and a little WD40. Be sure to apply gradual, consistent, “bursts” when using a breaker bar on something like this as we want to eliminate any possibility of rounding of the nut or deformation of the bolt although it should hold up fine.
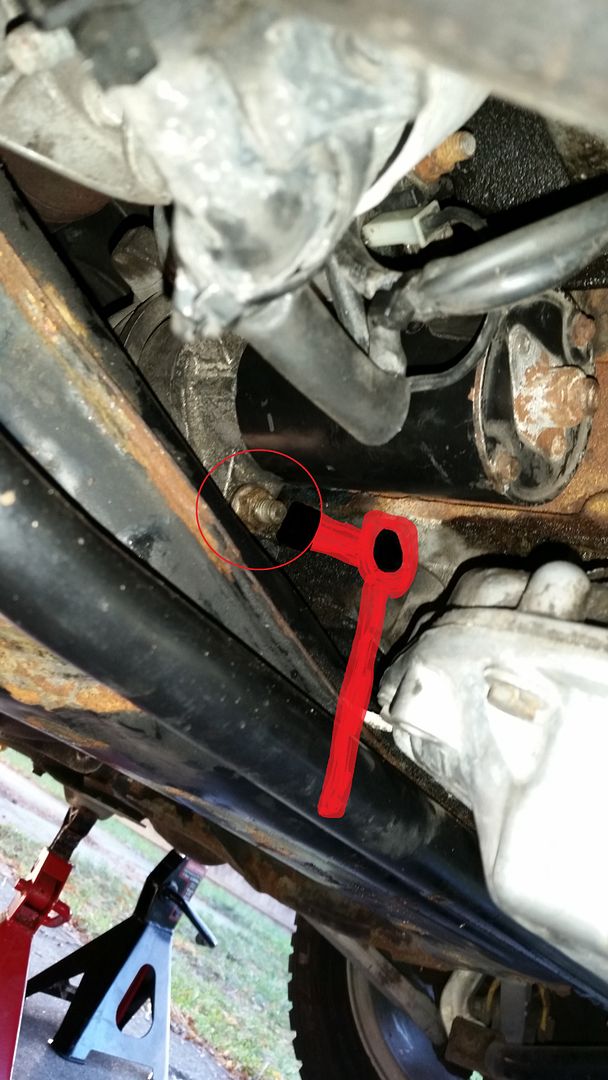
(the roll bar should be removed but the picture was added later)
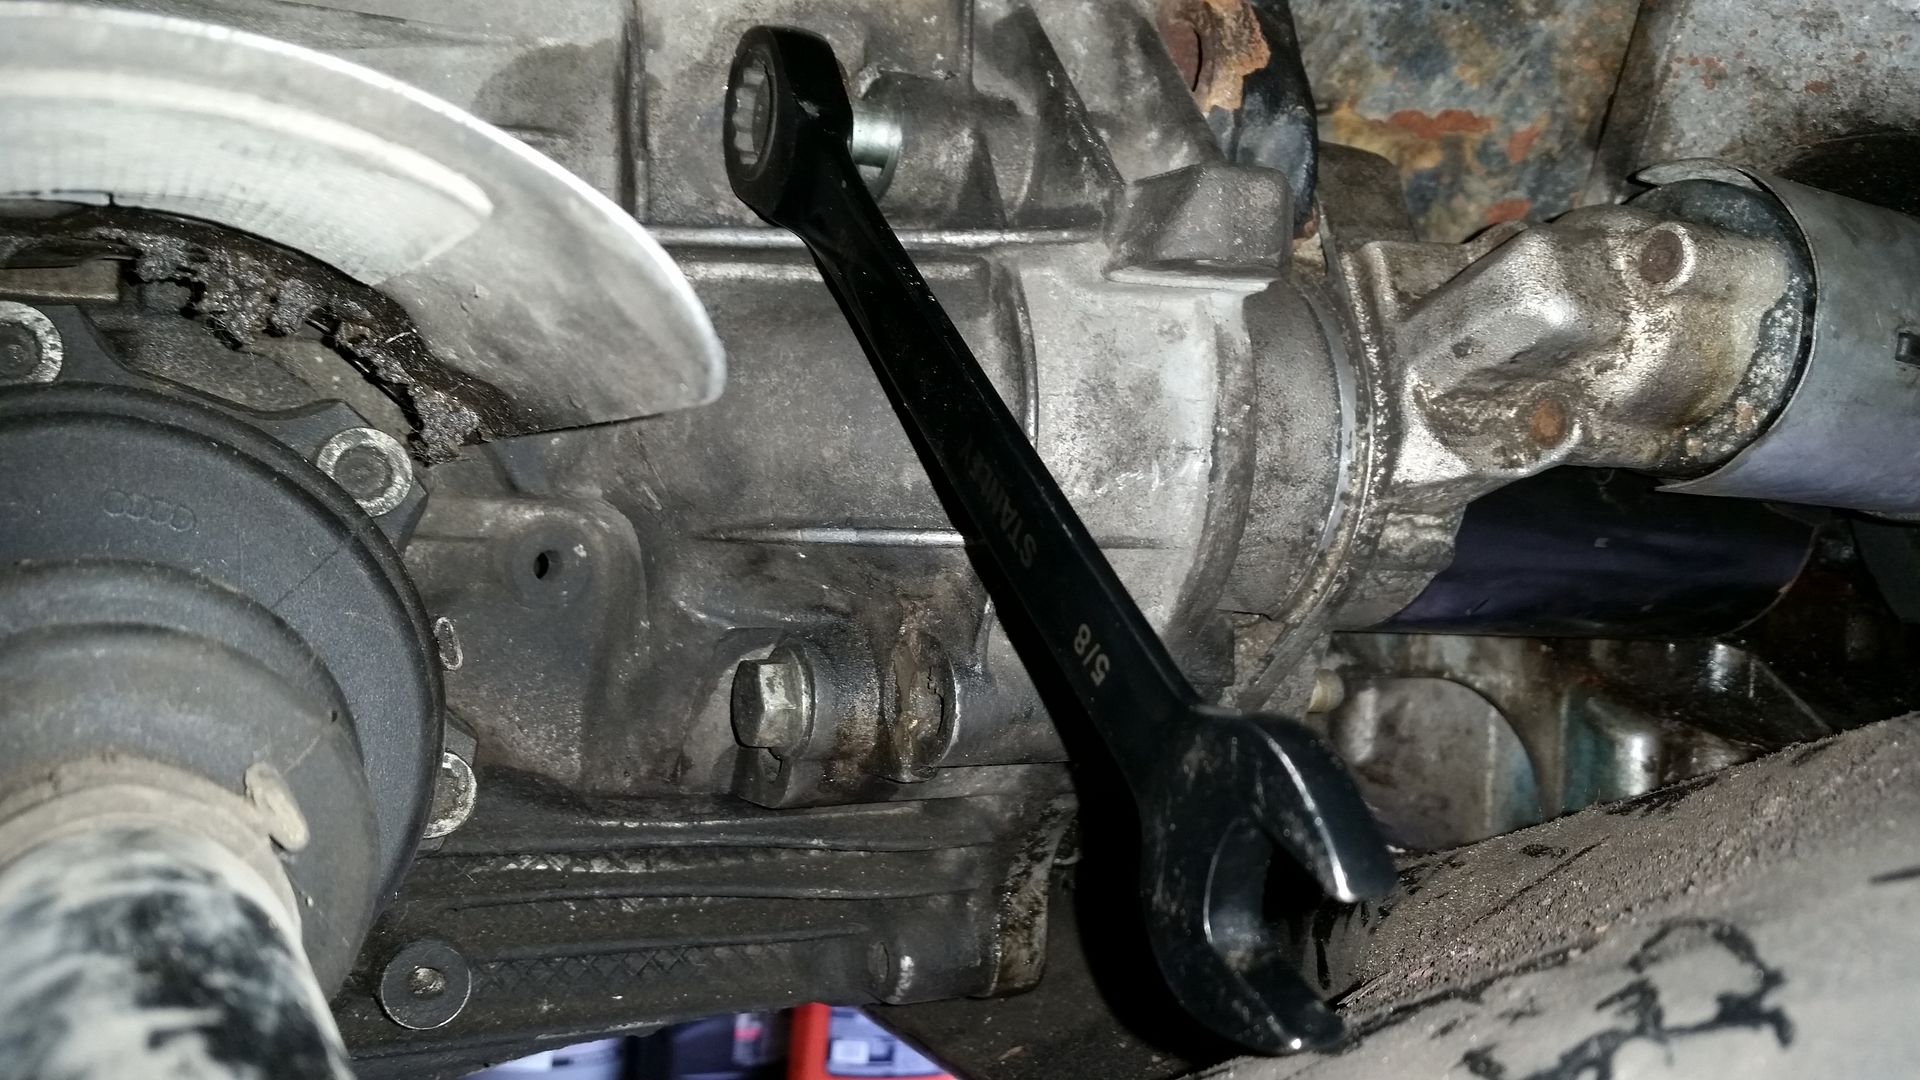
5. Now that the bottom bolt is removed it’s time to start on the top bolt. To get enough torque on this bolt to break it free, I went through the passenger wheel area and interlocked two wrenches together to create more of a lever action. After breaking the bolt free I used a 5/8” ratcheting wrench to remove it but it could just as easily be done with something else.
6. Once you remove these two bolts the starter can be wiggled out through the passenger wheel area.
7. Installation is opposite of removal.
Grab a beer and marvel to your significant other, roommate, parent, etc about awesome you are and how much money you just saved.

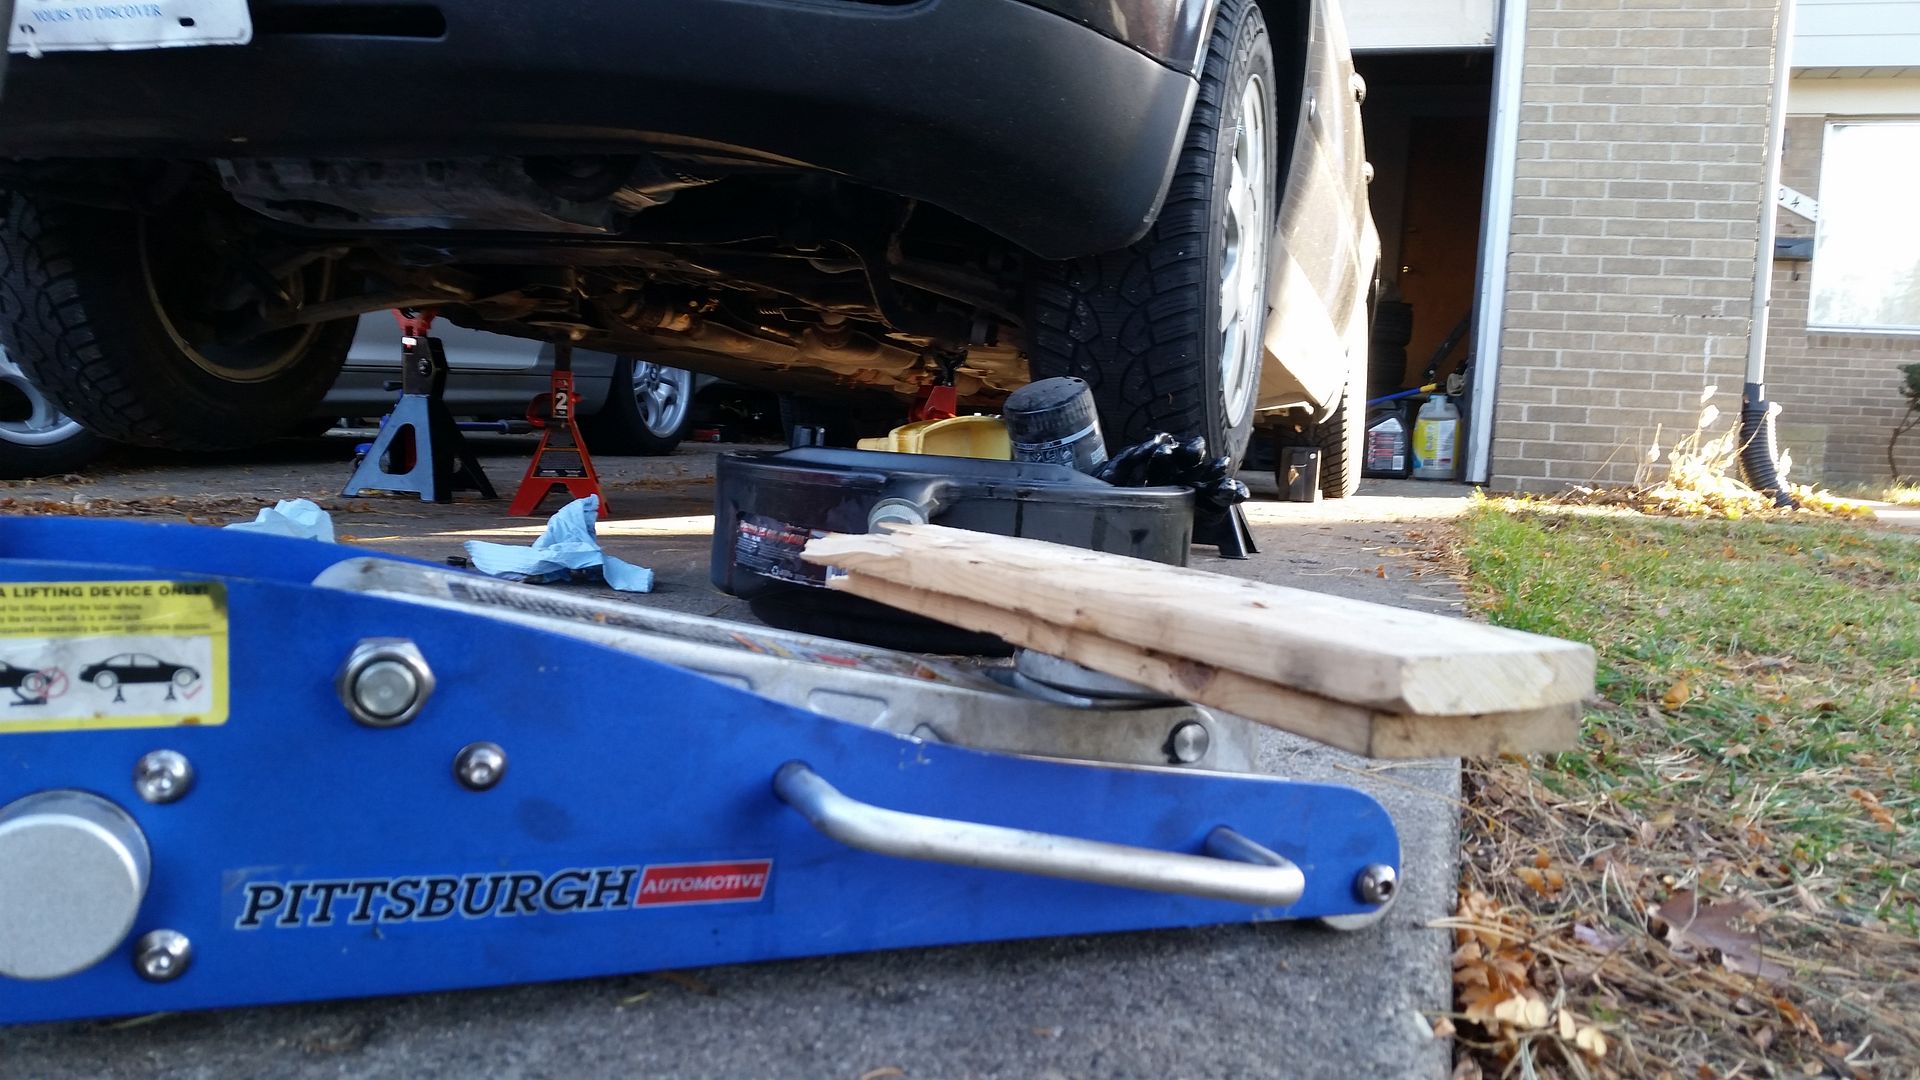
I need this small jack to lift the sill a bit before I use lift the whole front end.

Jack Stand Setup
Disclaimer: I AM NOT RESPONSIBLE FOR ANY DAMAGE THAT MAY OCCUR TO YOU AND/OR YOU'RE VEHICLE WHILE USING THIS DIY.
Tools:
• Sockets – 12mm, 13mm, 16mm, 5/8”
• Wrench – 16mm, 5/8”
Steps:
1. Disconnect vehicle battery, crack front passenger wheel bolt, properly lift front of vehicle and secure on jack stands. (My personal vehicle lifting and supporting setup at bottom).
2. Removed the four bolts securing the sway bar and let it swing out of the way for now. The subframe directly behind the roll bar, highlighted in blue, is where I jack my car up from with a couple of 1x4s or so.

3. Remove the nut securing the main wires to the starter along with the plastic wire connector. It’s impossible not to break the plastic tab but it is a snug fit regardless. (Optional step: spray plastic connector with electrical contact cleaner and use a test light to check that this “trigger wire” is getting power when you turn the key)
4. With everything now out of the way start by removing the lower bolt/nut. I used a half inch drive socket wrench with an extension that was the perfect length to wiggle into the small space where the nut is and a wrench to hold the head of the bolt. I believe both 16mm and 5/8” work in this application but I believe I used 16mm for this bolt/nut combo. To start breaking the bottom bolt before backing it out I had to use a breaker bar and a little WD40. Be sure to apply gradual, consistent, “bursts” when using a breaker bar on something like this as we want to eliminate any possibility of rounding of the nut or deformation of the bolt although it should hold up fine.


(the roll bar should be removed but the picture was added later)
5. Now that the bottom bolt is removed it’s time to start on the top bolt. To get enough torque on this bolt to break it free, I went through the passenger wheel area and interlocked two wrenches together to create more of a lever action. After breaking the bolt free I used a 5/8” ratcheting wrench to remove it but it could just as easily be done with something else.

6. Once you remove these two bolts the starter can be wiggled out through the passenger wheel area.

7. Installation is opposite of removal.
Grab a beer and marvel to your significant other, roommate, parent, etc about awesome you are and how much money you just saved.


I need this small jack to lift the sill a bit before I use lift the whole front end.

Jack Stand Setup

")


