

I took much of the information from this thread and this one, took some good pictures, and did a wrap-up write-up, including a couple short cuts.
Note 1: DO NOT connect the B5.5 lights to the B5 harness without reordering the wires first (see below). If you already did go change the corresponding 5 Amp fuse for rear parking light.
Note 2: Light bulb change from now on will be impossible without taking the whole tail light assembly out. So, if you plan on changing bulbs or doing your rear fog, do it now before the swap.
Tools: 8mm nut driver or an 8mm socket used as a screwdriver bit, 8mm open ended wrench, and a small paper clip.
Parts: You’ll need two 8mm nuts and washers in addition to your stock nuts. The OEM part number for the nut is 171-857-026-A. I just went to the hardware store and got some there. You’ll also need 4 brackets to hold the B5.5 tails in place as well.
![Image]()
The install is pretty simple. The B5 tails have three mounting points, whereas, the B5.5 tails have four. The B5.5 tails use two of the same mounting holes (the outside ones). The inside ones will need brackets to hold the tails in place.
![Image]()
![Image]()
![Image]()
![Image]()
![Image]()
Passenger Side
old wiring: empty/fog - red - green - brown - gray - blue
old legend: rf/NES - BR - BL - 31 - 58(SL)- nes/RF
new legend: 31 - NSL - BL - SL - BR - RF
new wiring: brown -empty/fog- green - gray - red - blue
![Image]()
Driver Side
old wiring: blue - red - black - brown - gray - empty/fog
old legend: RF/nes- BR - BL - 31 - 58(SL) - NES/rf
new legend: RF - BR - SL - BL - NSL - 31
new wiring: blue - red - gray - black - empty/fog- brown
![Image]()
Position the B5.5 tails onto the car and screw on the outer two nuts on each side. Use the brackets and extra nuts to secure the inner side of the assemblies to the body panel as pictured.
![Image]()
![Image]()
![Image]()
Make sure you’ve got the wiring correct and plug the harness in. Test the lights and you’re done!
Before:
![Image]()
After:
![Image]()
Note 1: DO NOT connect the B5.5 lights to the B5 harness without reordering the wires first (see below). If you already did go change the corresponding 5 Amp fuse for rear parking light.
Note 2: Light bulb change from now on will be impossible without taking the whole tail light assembly out. So, if you plan on changing bulbs or doing your rear fog, do it now before the swap.
Tools: 8mm nut driver or an 8mm socket used as a screwdriver bit, 8mm open ended wrench, and a small paper clip.
Parts: You’ll need two 8mm nuts and washers in addition to your stock nuts. The OEM part number for the nut is 171-857-026-A. I just went to the hardware store and got some there. You’ll also need 4 brackets to hold the B5.5 tails in place as well.

The install is pretty simple. The B5 tails have three mounting points, whereas, the B5.5 tails have four. The B5.5 tails use two of the same mounting holes (the outside ones). The inside ones will need brackets to hold the tails in place.

- Unscrew the mounting nuts. The passenger side is easy and pretty straight forward. Use the open ended wrench to get to the inside nuts. There’s one tricky nut on the driver’s side behind the CD changer shelf. It's very difficult to get to this nut without removing the shelf, but don’t bother removing the shelf. Locate the nut and drill a nickel sized hole through the shelf right in front of the nut. This hole will allow you to access that nut readily and easily without removing the shelf. This is especially nice if you switch tail a lot.


- Pull the wiring harness off the taillight assembly and separate the tails from the car. Now it’s time to rearrange the wiring in the harness. Open up the harness to switch the wires. Take the paper clip and push it into the harness as shown in the picture. Push it as far as it’ll go and tug on the wire. Rearrange the wires using the following chart and the pictures for reference.
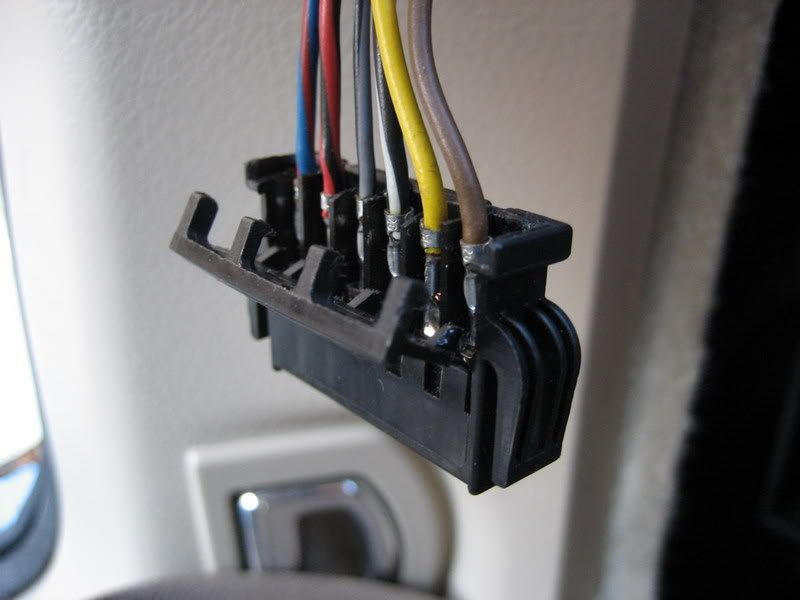

Passenger Side
old wiring: empty/fog - red - green - brown - gray - blue
old legend: rf/NES - BR - BL - 31 - 58(SL)- nes/RF
new legend: 31 - NSL - BL - SL - BR - RF
new wiring: brown -empty/fog- green - gray - red - blue

Driver Side
old wiring: blue - red - black - brown - gray - empty/fog
old legend: RF/nes- BR - BL - 31 - 58(SL) - NES/rf
new legend: RF - BR - SL - BL - NSL - 31
new wiring: blue - red - gray - black - empty/fog- brown

Position the B5.5 tails onto the car and screw on the outer two nuts on each side. Use the brackets and extra nuts to secure the inner side of the assemblies to the body panel as pictured.


Make sure you’ve got the wiring correct and plug the harness in. Test the lights and you’re done!
Before:
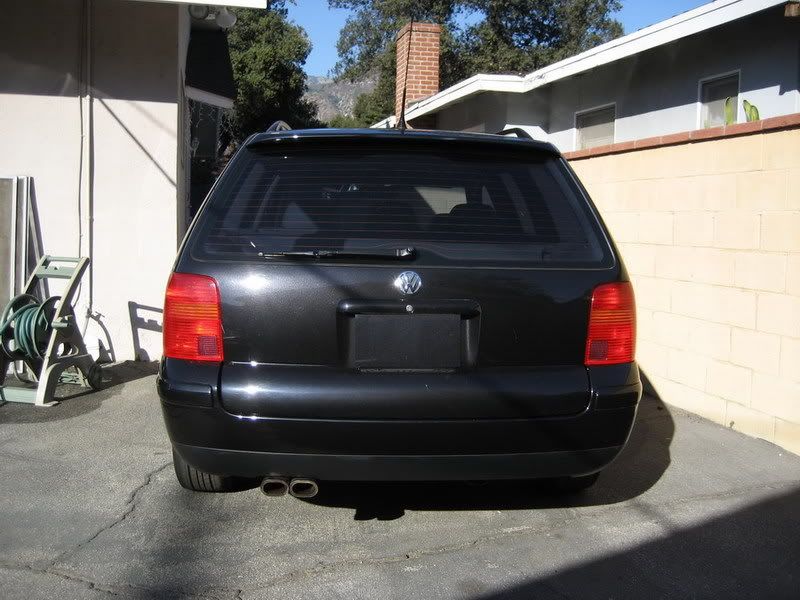
After:


